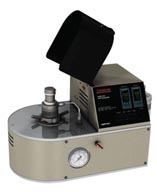
The Smallest Footprint 30,000 psi Viscometer for Drilling and Completion Fluids
The search for deeper reservoirs in harsher environments is testing the limits of drilling and completion fluids. Testing requirements have now exceeded the limits of most traditional instruments. Viscosity measurements are no exception. The Chandler Engineering design team lead the industry with the introduction of the Model 7600 Ultra High Pressure High Temperature Viscometer in 2005 to exceed the anticipated requirements of the industry for the next 10 years.
The same design expertise has taken that Robust design and developed a more compact version of the viscometer. The Model 7500 HPHT Viscometer has many of the same features as the Model 7600. However, in order to satisfy the greater need of the industry, the instrument design was made to be extremely user friendly with only slightly lowered limits. Additionally the Model 7500 was designed to comply with US and European safety standards, an industry first.
The Model 7500 boasts shear rate accuracy and a magnetically coupled optically encoded torque measurement which enables sensitive, precise viscosity measurement in spite of the harsh temperatures and pressures. The small size and light-weight design of the system is as remarkable as its superb performance. Through new technology, the combined weight of the instruments vessel plug and sample cup has been kept to a mere 12 pounds for easier, safer handling and cleaning.
The Model 7500 is a fully automated viscometer. The associated software is a powerful data acquisition and analysis tool designed to be operator friendly. Through the software, which can run on almost any computer, virtually any test cycle can be programmed and run. It can be set-up to automatically capture peak gel strength as well as 10 second and 10 minute gel values.
Designed to provide users with as much flexibility as possible, the control software even allows a test cycle to be edited during testing. Test cycles can be easily paused and resumed or profile steps skipped. The software even has the capability to run automatic calibration cycles using your calibration fluids.
Once testing is completed, the results can be displayed in user-configurable graphs. Sharing test results with other programs and colleagues is very easy as all test data is stored in a universal spreadsheet file format.
Features
• User Friendly
• Compact Size
• Ergonomically Designed
• Designed for Safety
• Automated With Data Acquisition
• Meets API/ISO Standards
• Optically Encoded Torque Measurement
Small Size: 25 in. W x 16 in. D; 150 lbs
• Lightweight vessel plug & sample cup assembly
• Only 12 pounds / 5.4 kg to lift
Regulatory:
• CE—European safety standards
• UL—US safety standards
• API/ISO—Drilling and completion fluids standards
Sample Environment:
• Maximum Temperature 600°F / 316°C
• Maximum Pressure 30,000 psi / 207 MPa
Sample Rheology:
Using standard B1 bob and R1 rotor
• Shear Rate Range: 0.0017—1021 sec–1
• Shear Rate Accuracy: ±0.25% of F.S.
• Motor Speed Range: 0.001—600 rpm
• Shear Stress Range: 2—6000 dyne / cm2


